#100DaysOfFoodBlogging, Recipes

Iced Mojito Latte

Mojito Iced Latte | getinmymouf.com

[This is post #027 towards #100DaysOfFoodBlogging, our goal to do 100 posts in 100 days as part of The 100 Day Project.]

I made a mistake last time we went to San Francisco. I did not go to Philz Coffee.

Why is this a BIG deal? They’re known for a Mint Mojito Iced Coffee. Doesn’t seem like that big of a deal to add mint, right? Well, unlike some other chains, this isn’t just a shot of coffee, splash of milk, and some mint syrup. Nope, you’re getting fresh mint leaves in your cup. And where mint syrup tends to taste like chewing gum, fresh mint leaves taste like mother earth is cooling you with her own breath.

Mojito Iced Latte | getinmymouf.com

The Mint Mojito Iced Coffee was what kicked off our elopement trip, as we had to kill some time before getting our marriage license from San Francisco City Hall. So, it’s possible the sentimentality of it is also playing a factor. Either way, it’s a freaking refreshing drink that should be the start of every trip to San Francisco.

We tried making a Mojito Latte a few times when we returned home. I think we might have used either a Keurig or a simple french press and it was good, but not Philz good. As such, we kind of gave up on making it.

Nearly two years later, I’m armed with some better ammo: An Aerobie AeroPress coffee maker, Monument Coffee Roasters beans, and an article about espresso cocktails.

Mojito Iced Latte | getinmymouf.com

That last one is interesting, as it talks about a small, yet growing trend of using the same methods and ingredients for standard alcoholic cocktails, but substituting the alcohol for coffee. So simple, yet so brilliant.

This made me realize how I could make the Mojito Latte even better: Use the exact method for making a mojito, including lime juice and freshly muddled mint.

That didn’t quite work…

The lime juice kind of takes over and kills the coffee taste and also curdles the milk. I tried a few times to make the lime juice work with varying amounts and different types of milk (like coconut), but it still wasn’t very good. I really didn’t want to skip on the lime element, as then it’s not a Mojito. It would just be a Mint Latte. I didn’t want a Mint Latte. I wanted a Mojito Latte.

Fortunately, the drawer of our cooking utensils was partially open and the citrus zester was peeking out. DUH. Lime zest. A hint of lime, none of the curdling power.

Alas, it was perfect! Okay, maybe not Philz perfect, but pretty close. Actually, it has been a couple years so it’s possible that this one is better than Philz (doubtful). Good thing we’re headed back to San Francisco this summer, so I can give it the proper comparison.
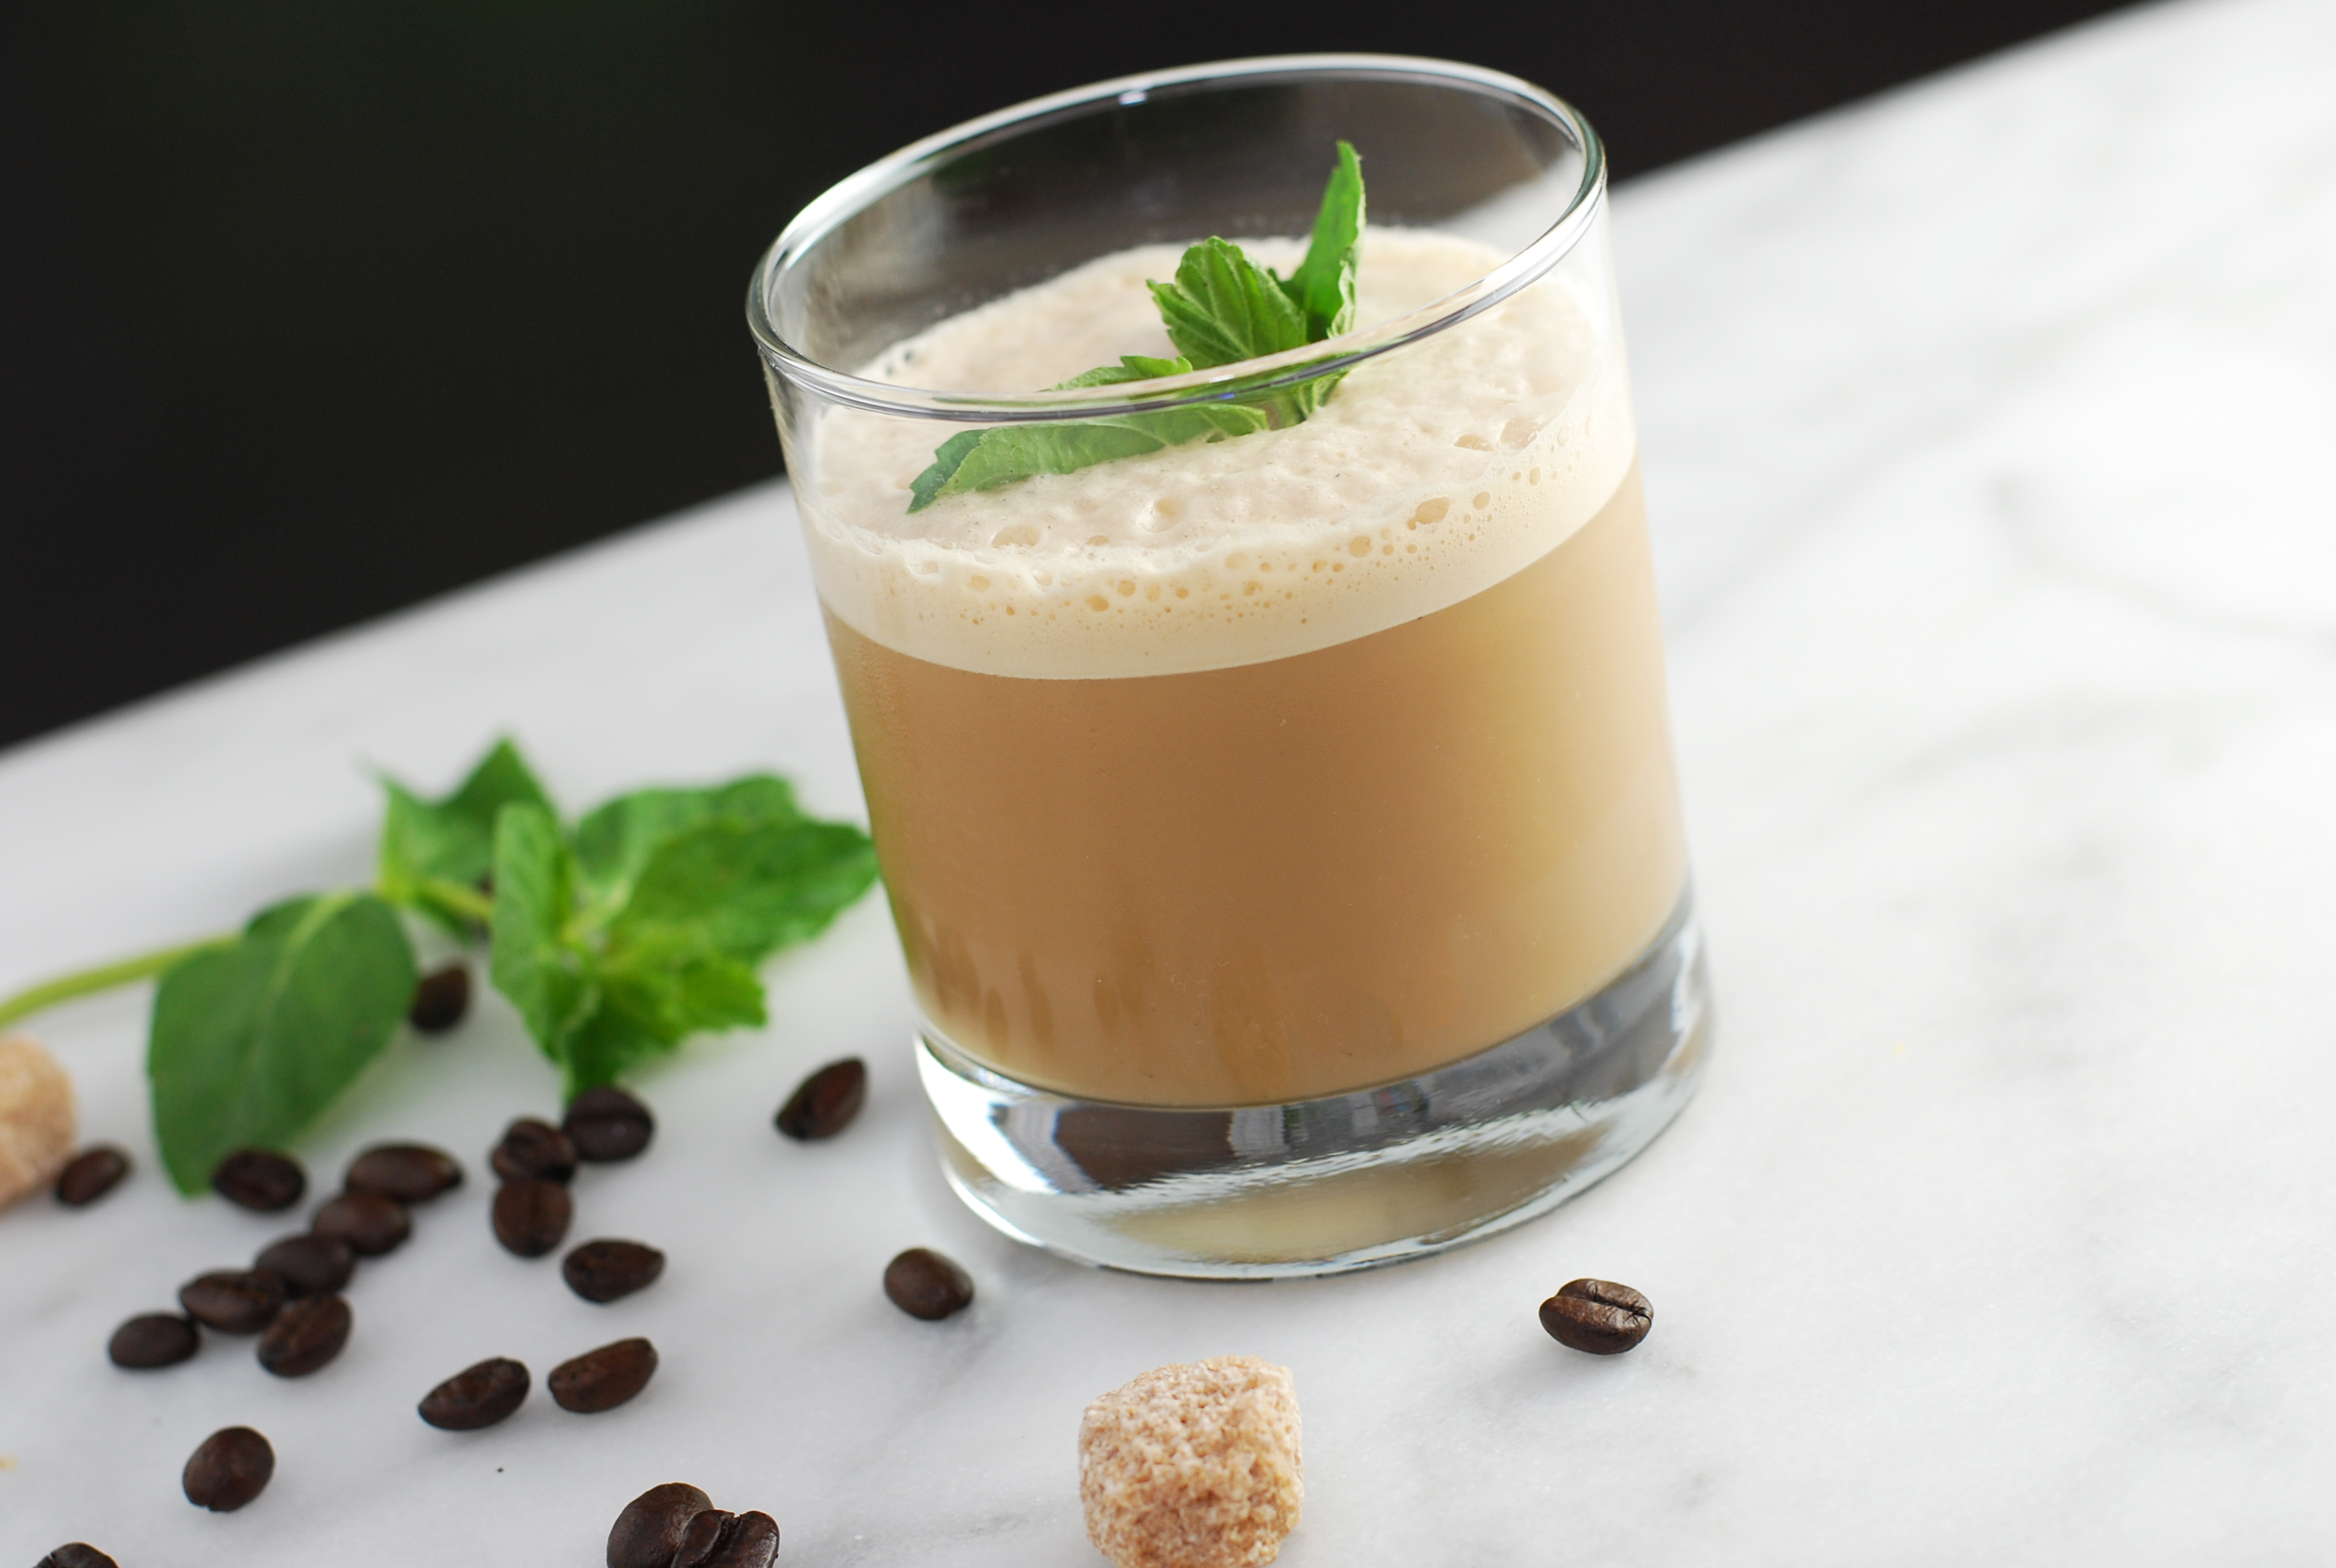
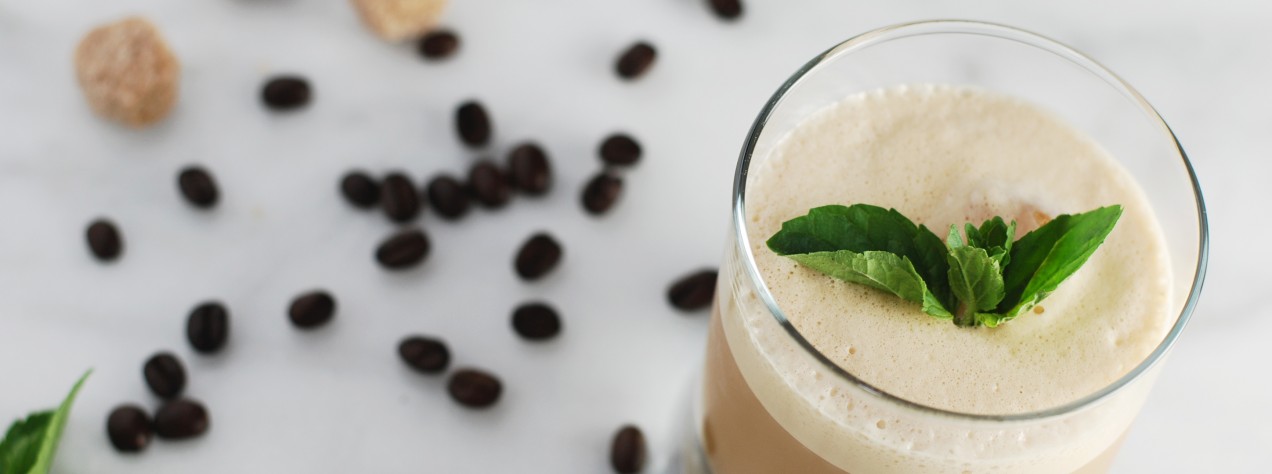
Mojito Iced Latte | getinmymouf.com

Iced Mojito Latte

Makes one glass.

  • 2-4 oz Strong Coffee or Espresso
  • 2-4 oz Milk
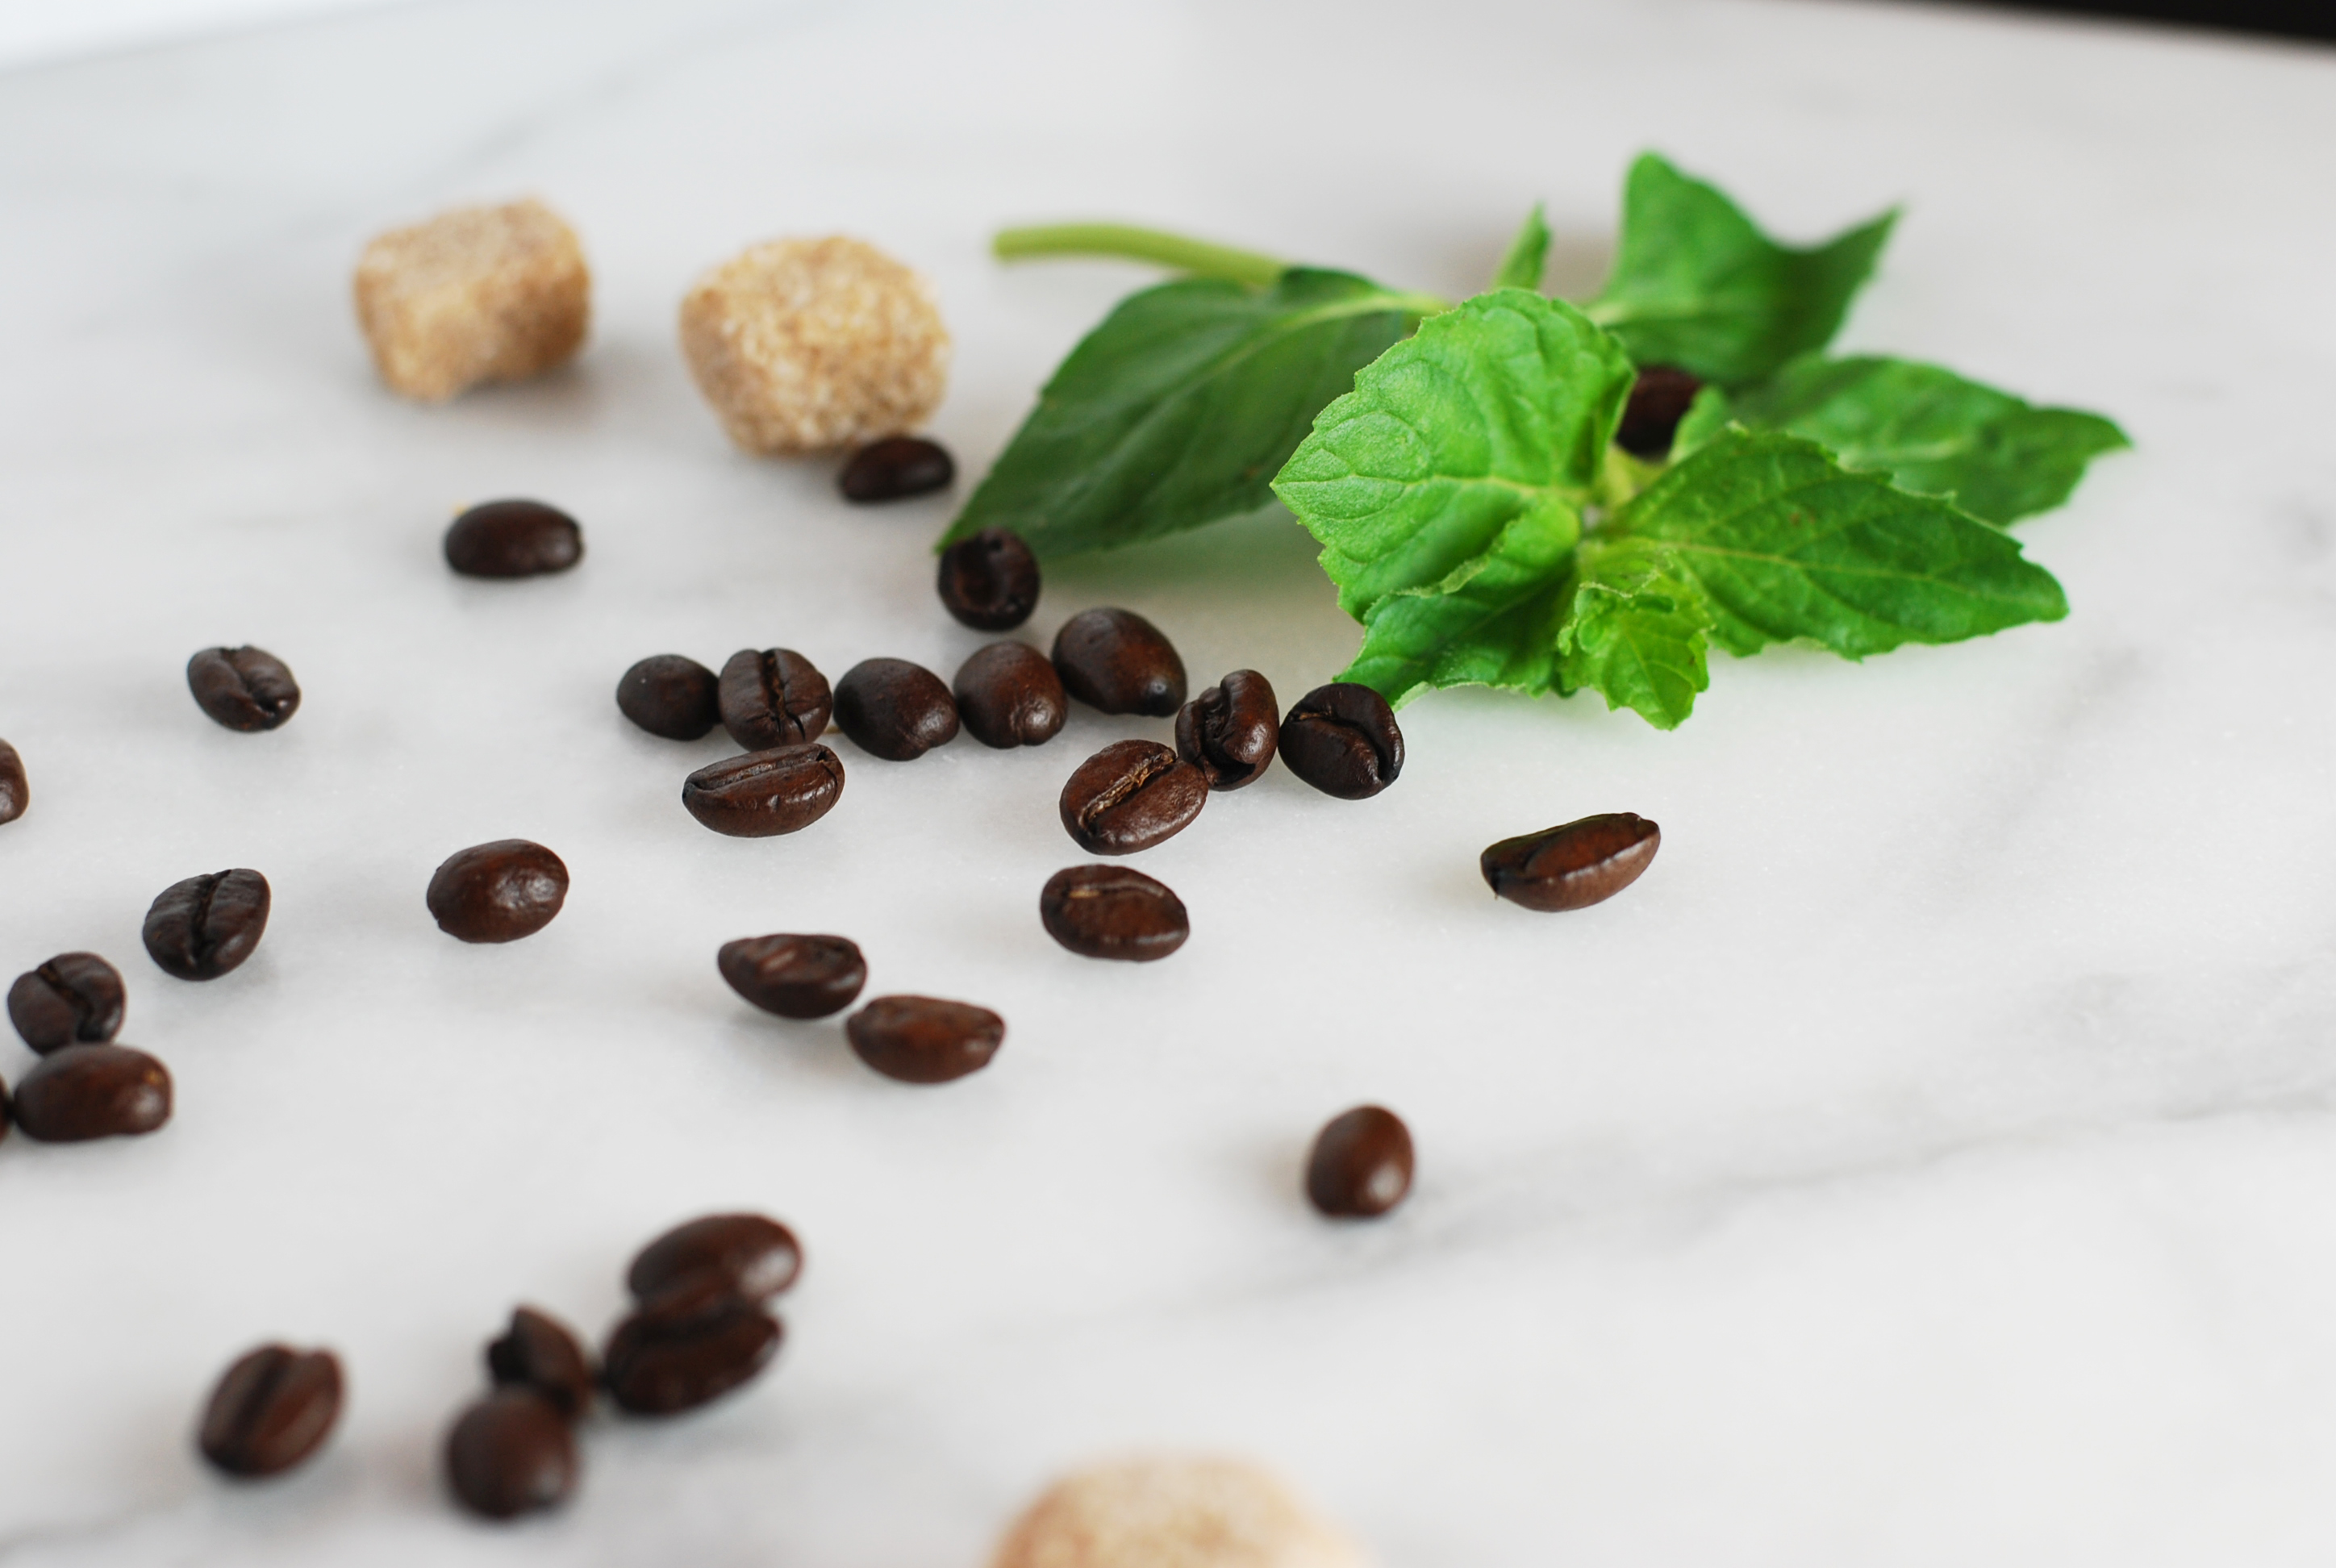
  • 6-10 Fresh Mint Leaves
  • Zest from half a Lime
  • 2 – 4 teaspoons Sugar or Simple Syrup
  • Ice

1.  Prepare your coffee as you normally would; I prefer the Aerobie Aeropress, but you can use whatever you like. The important part is that it should be as close to “espresso-strong” as possible. The range in amount is so you can adjust based on strength.  Let the coffee cool a bit while you prepare the rest of the drink.

2.  Add the sugar to a cocktail shaker, next the lime zest, then add the mint. Gently muddle the mint leaves to release the flavor; don’t work too hard, as the mint shouldn’t be torn to shreds.

3.  Pour in the coffee (it’s okay if it’s still a bit hot), about five ice cubes, and your milk. In that order.

4.  Shake it like a Polaroid picture, then strain into a glass.

No, this isn’t necessarily something you’ll be making at 6:30 AM on a Tuesday, but it’s worth the effort when you have time. Especially if you need a refreshing afternoon pick-me-up after spending six hours ripping up monkey grass and planing bushes. True story.

Still thirsty? Drink up our Grapefruit Cinnamon Simple Syrup and Soda recipe.


Standard
#100DaysOfFoodBlogging, Cooper's Corner, Recipes

Dog-Friendly PB Ice Cream Sandwiches

Peanut Butter Ice Cream Sandwich | getinmymouf.com

[This is post #026 towards #100DaysOfFoodBlogging, our goal to do 100 posts in 100 days as part of The 100 Day Project.]

A couple prefaces for this post:

1.  These ice cream sandwiches are gluten free. Cool.

2.  You can share them with your dog. Even cooler.

Peanut Butter Ice Cream Sandwich | getinmymouf.com


Last year for our pup’s birthday, we made him Peanut Butter PUPCakes. As expected, he devoured them and loved us forever and it was the greatest day of his life.

However, we tasted the pupcakes and immediately realized that they were not designed for humans. It wasn’t unsafe or anything, but it could have easily won the award for Worst Human Cupcake of 2014.

Peanut Butter Ice Cream Sandwich | getinmymouf.com

So, this year we wanted to make something for Cooper’s 5th birthday that not only he could enjoy, but something we wouldn’t want to immediately spit into a garbage can.


This isn’t a complex recipe and, to be honest, this is really just an excuse to post a few more dog pictures. But the peanut butter cookies are really good, so nothing was spit into the trash. In fact, I dropped part of my cookie on the floor and still ate it.

Peanut Butter Ice Cream Sandwich | getinmymouf.com


Oh and like I mentioned above, the cookies are gluten free, so even if you or your dog has Celiac Disease you can both still partake in the ice cream sandwich festivities.


Peanut Butter Ice Cream Sandwich | getinmymouf.com

Dog-Friendly PB Ice Cream Sandwiches

  • 1 Cup Peanut Butter
  • 1 XL Egg
  • 1/2 Cup Sugar
  • 1 Teaspoon Vanilla Extract
  • Vanilla Ice Cream, Frozen Yogurt, or Canine Sweet Potato Froyo

1. Preheat the oven to 350 degrees F. In a medium bowl, mix the peanut butter, sugar, vanilla and egg until well combined. Yep, it’s that easy.

2. Using a standard ice cream scoop, spoon level scoops of dough about 1-inch apart on a cookie sheet covered with parchment paper. If all goes to plan, you should end up with about 7 large cookies…which means you’ll have one available for snacking. Flatten the mounds with the tines of a fork, making a crosshatch pattern.

3. Bake until golden around the edges, about 13 to 15 minutes.

4. Allow to cool completely then fill with your favorite ice cream or frozen yogurt.


Want some more canine-friendly posts?  Then check THESE out:

Standard
#100DaysOfFoodBlogging, Shopping While Hungry, Thought Nuggets

The Dangers of Shopping While Hungry

Dangers of Shopping While Hungry | getinmymouf.com

[This is post #025 towards #100DaysOfFoodBlogging, our goal to do 100 posts in 100 days as part of The 100 Day Project.]

It always starts with milk. ALWAYS.

Every grocery trip ever conceived has always begun with an empty milk carton. This trip is no different…

And the timing isn’t great, as you were about to have a late afternoon snack. Nothing fancy, just a quick bowl of cereal. However, you notice the empty milk carton. Judging you. Taunting you. Milky laughter echoes throughout your kitchen.

So, instead of having your snack, you decide to dare to go grocery shopping…while hungry.

As you enter the store, you’re full of optimism. But a salad is going to take forever. There’s the washing and cutting and more washing. And then you have to shake the salad dressing… Just thinking about all that work is exhausting. Your armpits are even sweating through your shirt.

So, you enter the frozen food section with a stomach already roaring like the MGM Lion. Maybe you could grab a frozen meal for lunch. It’d be cheap and quick. Save the salad for dinner.

Excellent idea!

Then you remembered you already have dinner plans, so the salad will have to wait for tomorrow’s lunch. As you look at the lettuce you realize that it’s a tiny bit brown on one leaf…

You decide that it’s better not to risk lettuce spoilage, so you decide to put all the salad ingredients back. But since you’re hungry and in a hurry, rather than walking back to each section, you dump them all in the frozen case with the ice cream. It’s a freezer, so it’s not like anything will spoil. The lettuce might even last longer in the freezer. You’re helping the store out. Very good.

After you hide a tomato behind a tub of Chunky Monkey, your eye catches the box of what appears to be the most delicious turkey dinner in the world. (It’s clearly not, but keep in mind your vision is slightly obscured by your hunger.)

You take a closer look…

Your mouth waters, as you inspect the package. There’s a picture of Thanksgiving dinner on the back–It looks just like grandma’s house! The table is set and WOW, look at that turkey. You start to believe that this meal will be delicious and you even convince yourself that you could buy this frozen box of turkey and carbs in lieu of an actual Thanksgiving dinner next year. Your grandmother will be sad, but you’ll send a card. It will be fine.

You toss the freezer turkey dinner into your basket and notice that there’s a sale: 10 for $25 (regularly priced at $2.51 each). You’re too hungry to do the math, so you grab 9 more frozen meals. Meatloaf. Swedish Meatballs. Mac ‘n’ Cheese. Boxes fill your basket; good thing you ditched all that salad produce. Smart.

You avoid eye contact at the check-out counter, for fear of being judged by the cashier at your sole purchase of ten cheap, generic TV dinners. You wish this grocery store had self-checkout. For a second you wish you had simply shoplifted the frozen food, but hiding all the frozen meals in your pants would be problematic. You pay with cash. No need to have this purchase linked to your credit card…

Once you’re home you’re so hungry that you carelessly rip the box open. The sharp corner gives you a paper cut. There’s blood on the counter, but you ignore it for now…

With the frozen turkey dinner removed from it’s packaging, you notice that the frozen version looks a lot like a giant brown ice cube. You can only assume the microwave will “make it all better.”

Turns out your turkey dinner’s directions require an advanced engineering degree from MIT: “Cook on 50% for 3 minutes, then rotate 75 degrees, remove plastic wrap, stir potatoes counter-clockwise, cook on high for 11 seconds, then cook for 12 minutes at 60% power, recover with plastic wrap and let sit for 10 minutes in direct moonlight.” Unfortunately you removed the plastic wrap before reading the instructions and there is a lack of moonlight since it is 2:30 in the afternoon, so you’re already screwed.

You end up just cooking it on high, uncovered for five minutes, or until the inside of your microwave is covered in gravy.

You’ve basically waited for what feels like a fortnight to take the first bite, which both burns your mouth and is also still partially frozen. To even things up, you stir everything around. Hot + Frozen = Warm, right?

The temperature is now lukewarm, which is fine, but unfortunately the stirring resulted in blood dripping into the food from your paper cut.

You’re so hungry now that you’re not above eating your own blood. You own the first season of TrueBlood on DVD and although you never finished it, you start to wonder what it would be like to be a vampire. Would’ve been helpful cooking this meal since you would have naturally been awake during the night, so you could have let the meal sit in moonlight as directed. But if you’re a vampire, why are you eating a frozen turkey dinner? Potentially, you could be trying to wean yourself off of blood, but–

The vampire fantasy is interrupted by the fact that you finally found a piece of turkey in hidden in the brown mush. Yay! Meat! You consider rationing this piece, for there is no guarantee that there will be others. It’s small, but you could probably get three bites from it. You then realize it’s too tough to actually cut, so you just eat it whole.

So, this is what Turkey chewing gum tastes like. You try to blow a bubble. No bubbles.

Once you feel like you’ve gotten as much turkey flavor out of the “meat” as possible you spit it out. But not onto the floor, into your cloth napkin. Yes, cloth. Even when eating a TV dinner you like to keep it classy.

You take another bite from the brown mush and…

You blackout.

Hard to say how long you’re out. Could be seconds, could be years.

When you awake, you realize you’ve not only finished your turkey dinner, but you’ve eaten ALL of the frozen meals you purchased.

You’re no longer hungry, but you are terribly thirsty. Likely because you just consumed your monthly allowance of sodium.

Hoping to find a cold beverage, you open the refrigerator and notice…

You are out of milk.

Standard
#100DaysOfFoodBlogging, Recipes

The Doughnut French Toast Waffle

Doughnut French Toast Waffle | getinmymouf.com

[This is post #024 towards #100DaysOfFoodBlogging, our goal to do 100 posts in 100 days as part of The 100 Day Project.]

As complicated as the title sounds, this recipe is actually quite easy. Too easy, in fact.

So easy that the waffle iron begged for this. It crawled over to my laptop (which, I keep on our kitchen counter ’cause that’s where it gets the most use). Then it found one of our recipes from last year, the Coffee-Infused Doughnut French Toast.

It was so intrigued by this leftover doughnut french toast, that it looked up at me and said, “I want doughnut french toast inside me.”

Who am I to deny a waffle iron of its destiny?

And destiny it is.

If you need one reason to buy a waffle maker, it’s not for waffles. It’s for leftover doughnut french toast. As much as I loved making the original recipe, this one basically kicks it up ten notches, as the doughnut glaze caramelizes into the nooks and crannies of the waffle iron. You’re left with a pleasantly crunchy exterior and a warm, delicate center.

This doughnut is a gentleman on the street and a freak in your mouf.

Doughnut French Toast Waffle | getinmymouf.com

Doughnut French Toast Waffles

  • 6 Glazed Doughnuts (stale or fresh)
  • 1/2 Cup Milk
  • 2 Extra Large Eggs
  • 1 teaspoon Cinnamon
  • Pinch of Salt
  • Cooking spray or oil to grease the waffle iron

1.  In a shallow glass pan, whisk together the milk, eggs, salt, and cinnamon.

2.  Use a toothpick to poke holes in the doughnuts on both sides (to allow the egg mixture to soak through).

3.  Pre-heat your waffle iron per the manufacturer’s instructions. While things are heating up, take one doughnut and let it sit in the batter for about a minute, then flip and let soak on the other side for another minute.

4.  Cook the doughnut in the waffle maker for about two minutes or until the outside is lightly caramelized.

5.  Repeat with the remaining doughnuts.

6.  You don’t need to serve this with anything at all; just wrap in a paper towel (‘cuz it’s freaking hot) and eat.

See. Way too easy.

If you like this Doughnut French Toast Waffle, you might also enjoy some Melted Ice Cream Banana Pancakes. Think about it.

Standard